FAQ |
|
Digital Micro Vicker Hardness Tester Common Problem Solutions
Source:Shanghai Jvjing Precision Instrument Manufacturing Co.,Ltd Author:ijian Date:2016-11-24
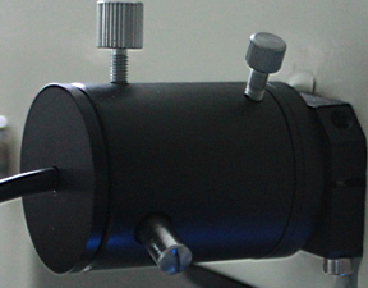
1、How to replace fuse? 1. Turn off the power switch. Unplug the power line. 2. Fuse power outlet is installed in the hardness tester, the switch and power jack is located in the middle, with the for-word when you need to use a small screwdriver gently inserted in the insurance lid to pry out the fuse box, remove the fuse inside. 3. Remove the fuse, check if the filament inside is broken. If you can not decide whether the fuse is broken or not, you can use an ohmmeter to check whether the filament is good. 4. If the fuse is damaged, please install a new fuse(there is spare fuses in accessories cases). 5. Push the fuse box back to its original position. 2、How to replace bulb ? Micro Hardness Tester Microscope lighting system adopted high-power LED light source, its service life is much longer than ordinary halogen bulbs. It is not easy to damage under normal circumstances. If it is damaged accidently, you can buy from company. Installation steps as follows: 1. Turn off the power supply. Unplug the power line. 2. Unplug the line of light source from the socket, catch light source seat with one hand and screw out rear cover of light source seat with another hand, then take out the rear cover of light source (Note: keep light source socket stable when screw out the back cover). Refer pic:
3. After replaced LED bulb, install rear cover to light source seat, then plug the light source cable into socket. 4. plug in the power line, turn on the machine, press the keyboard <↑> <↓> keys, the to moderate the brightness. 5. Observation throught micrometer eyepiece, adjust two adjustable screws on light source seat, make sure the field in eyepiece is bright and informity. 3、How to adjust the image in the center? If indentation image is not in the center of eyepiece field, you can adjust as following steps: The position of each screws need to adjust:
1.Solution of Image on the top of center
① Loose Screw 1 a little ② Loose Screw 2 a little ③ Tighten Screw 1, 3 seperately with small force to make image near the center, repeat the above steps if not enough. ④ Tighten Screw1,2,3 seperately and make sure the image in the center. 2. Solution of Image below center
① Loose Screw 1,3 a little ② Tighten Screw 2 a little to adjust image near center, repeat the above steps if not enough. ③ Tighten Screw1,2,3 seperately and make sure the image in the center. 3. Solution of image on the left of center
① Loose Screw 3 a little ② Loose Screw 2 a little ③ Loose Screw 1 a little to adjust image near center, repeat the above steps if not enough. ④ Tighten Screw1,2,3 seperately and make sure the image in the center. 4. Solution of image on the right of center
① Loose Screw 1a little ② Loose Screw 2 a little ③ Loose Screw 3 a little to adjust image near center, repeat the above steps if not enough. ④Tighten Screw1,2,3 seperately and make sure the image in the center. 5. Solution of image in any directions of center
① Do as the former steps to adjust image along horizonal (vertical) direction of center ②Then as former steps to adjust image into center along vertical (horizonal) direction It needs more patient to adjust image into center, after several trial, you can get it. 4. How to Install Indenter? Before delivery, there is a vickers indenter installed on the machine, if you have to take down the indenter to check, clear or replace, you need to re-install, steps as follows:
2. Tighten the screw 3. Do a full test process 4. Observing through 40X objective, the right position of image is one diagonal at horizontal direction, as follows:
5. If the image is not in the right position (as following), you should loose screw and rotate indenter slightly, then repeat step 2-4, until the image is in the right position.
5、How to check accuracy? It is important to check the system accuracy by hardness blocks. We supply 1-2 hardness blocks to you as standard accessory, you also can purchase your demanding hardness value. Check steps as follows: 1. Choose a hardness block 2. Put it on the working table 3. Indent on the block and measure, check if the value you get is within the allowed difference. 4. If the hardness difference is within allowed range, it means the machine works normal,you can start to test on your sample. 5. If your test result is much different with standard hardness value on hardness block, check if you do right as the standard operation. 6. If it can solve problem, do a serial test, then check the value: If results are very different, the problem may be wrong measure operation or wrong reading. If results are little different, there maybe many factors, you can contact with your supplier. 6、How to change printing paper ? If you can print, please check built-in printer. If you used up the paper, change a new one. Press▲button on the below right corner to open pinter cover, take down paper scroll and install new one. Cut the paper end like this:
Note: Width of printing paper 44mm. If there is no record on paper when you print, you may install paper on the opposite side. Any question, please contact us +86 21 51696069 or info@siomm.com |